Learn how to convert a tool chest into a grilling accessories holder.
If you love to grill, you know that keeping everything organized is half the battle. A cluttered grill station can take the joy out of barbecuing. With this simple project, you can transform a tool chest into a fully functional DIY grill accessories storage solution. By following this guide, which was inspired by Blain’s Farm & Fleet’s recent TV commercial, you’ll have everything you need neatly stored and accessible during your next cookout.
Keeping your grilling tools in one place can save you time and prevent unnecessary stress. Instead of frantically searching for your favorite seasoning or misplaced tongs, you’ll have one organized area for everything you need. Here are some key benefits of this DIY solution:
Enhanced Organization: Store tools, spices, grill accessories, and more in designated spots for quick access.
Durability: The sturdy construction of a tool chest ensures your grill accessories are stored safely and last longer.
Portability: Its rolling wheels make it easy to move the tool chest from your garage or shed to your preferred grilling area.
Customizable Setup: Tailor the compartments to meet your specific needs, whether it’s adding extra hooks or labeling the drawers.
What You’ll Need
Here’s a checklist of essential supplies you’ll need to get started:
Now that you have everything ready, it’s time to get started! Start by placing your tool chest in a spacious, flat work area. If you currently have tools inside, remove them and clean the interior thoroughly. Then, you’ll need to remove the bottom three drawers on one side of the chest to make space for the cooler.
How to Remove the Drawers:
Pull the drawer out completely until it stops.
Use a screwdriver or drill to remove the screws holding the drawer’s sliding mechanisms in place.
Carefully slide the drawer out, and set it aside (you can repurpose these for another project).
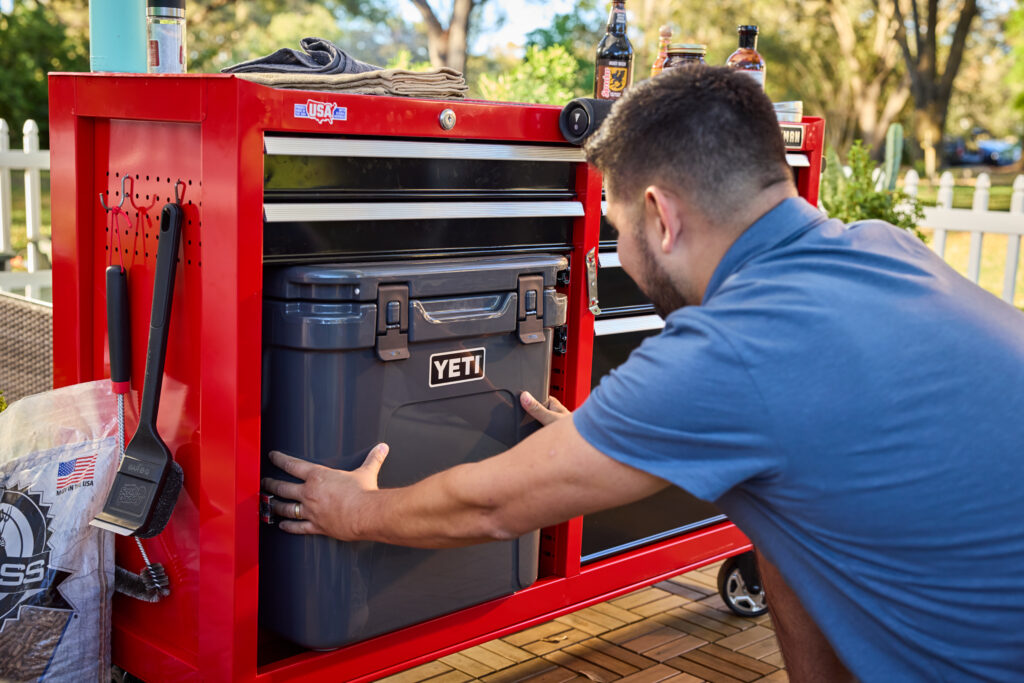
Step 2: Fit the Cooler
Now that you’ve created an open space, slide your YETI Roadie 48 Cooler into the empty section on the bottom shelf. This cooler is perfect for keeping drinks, meat, or other perishables cold while you grill.
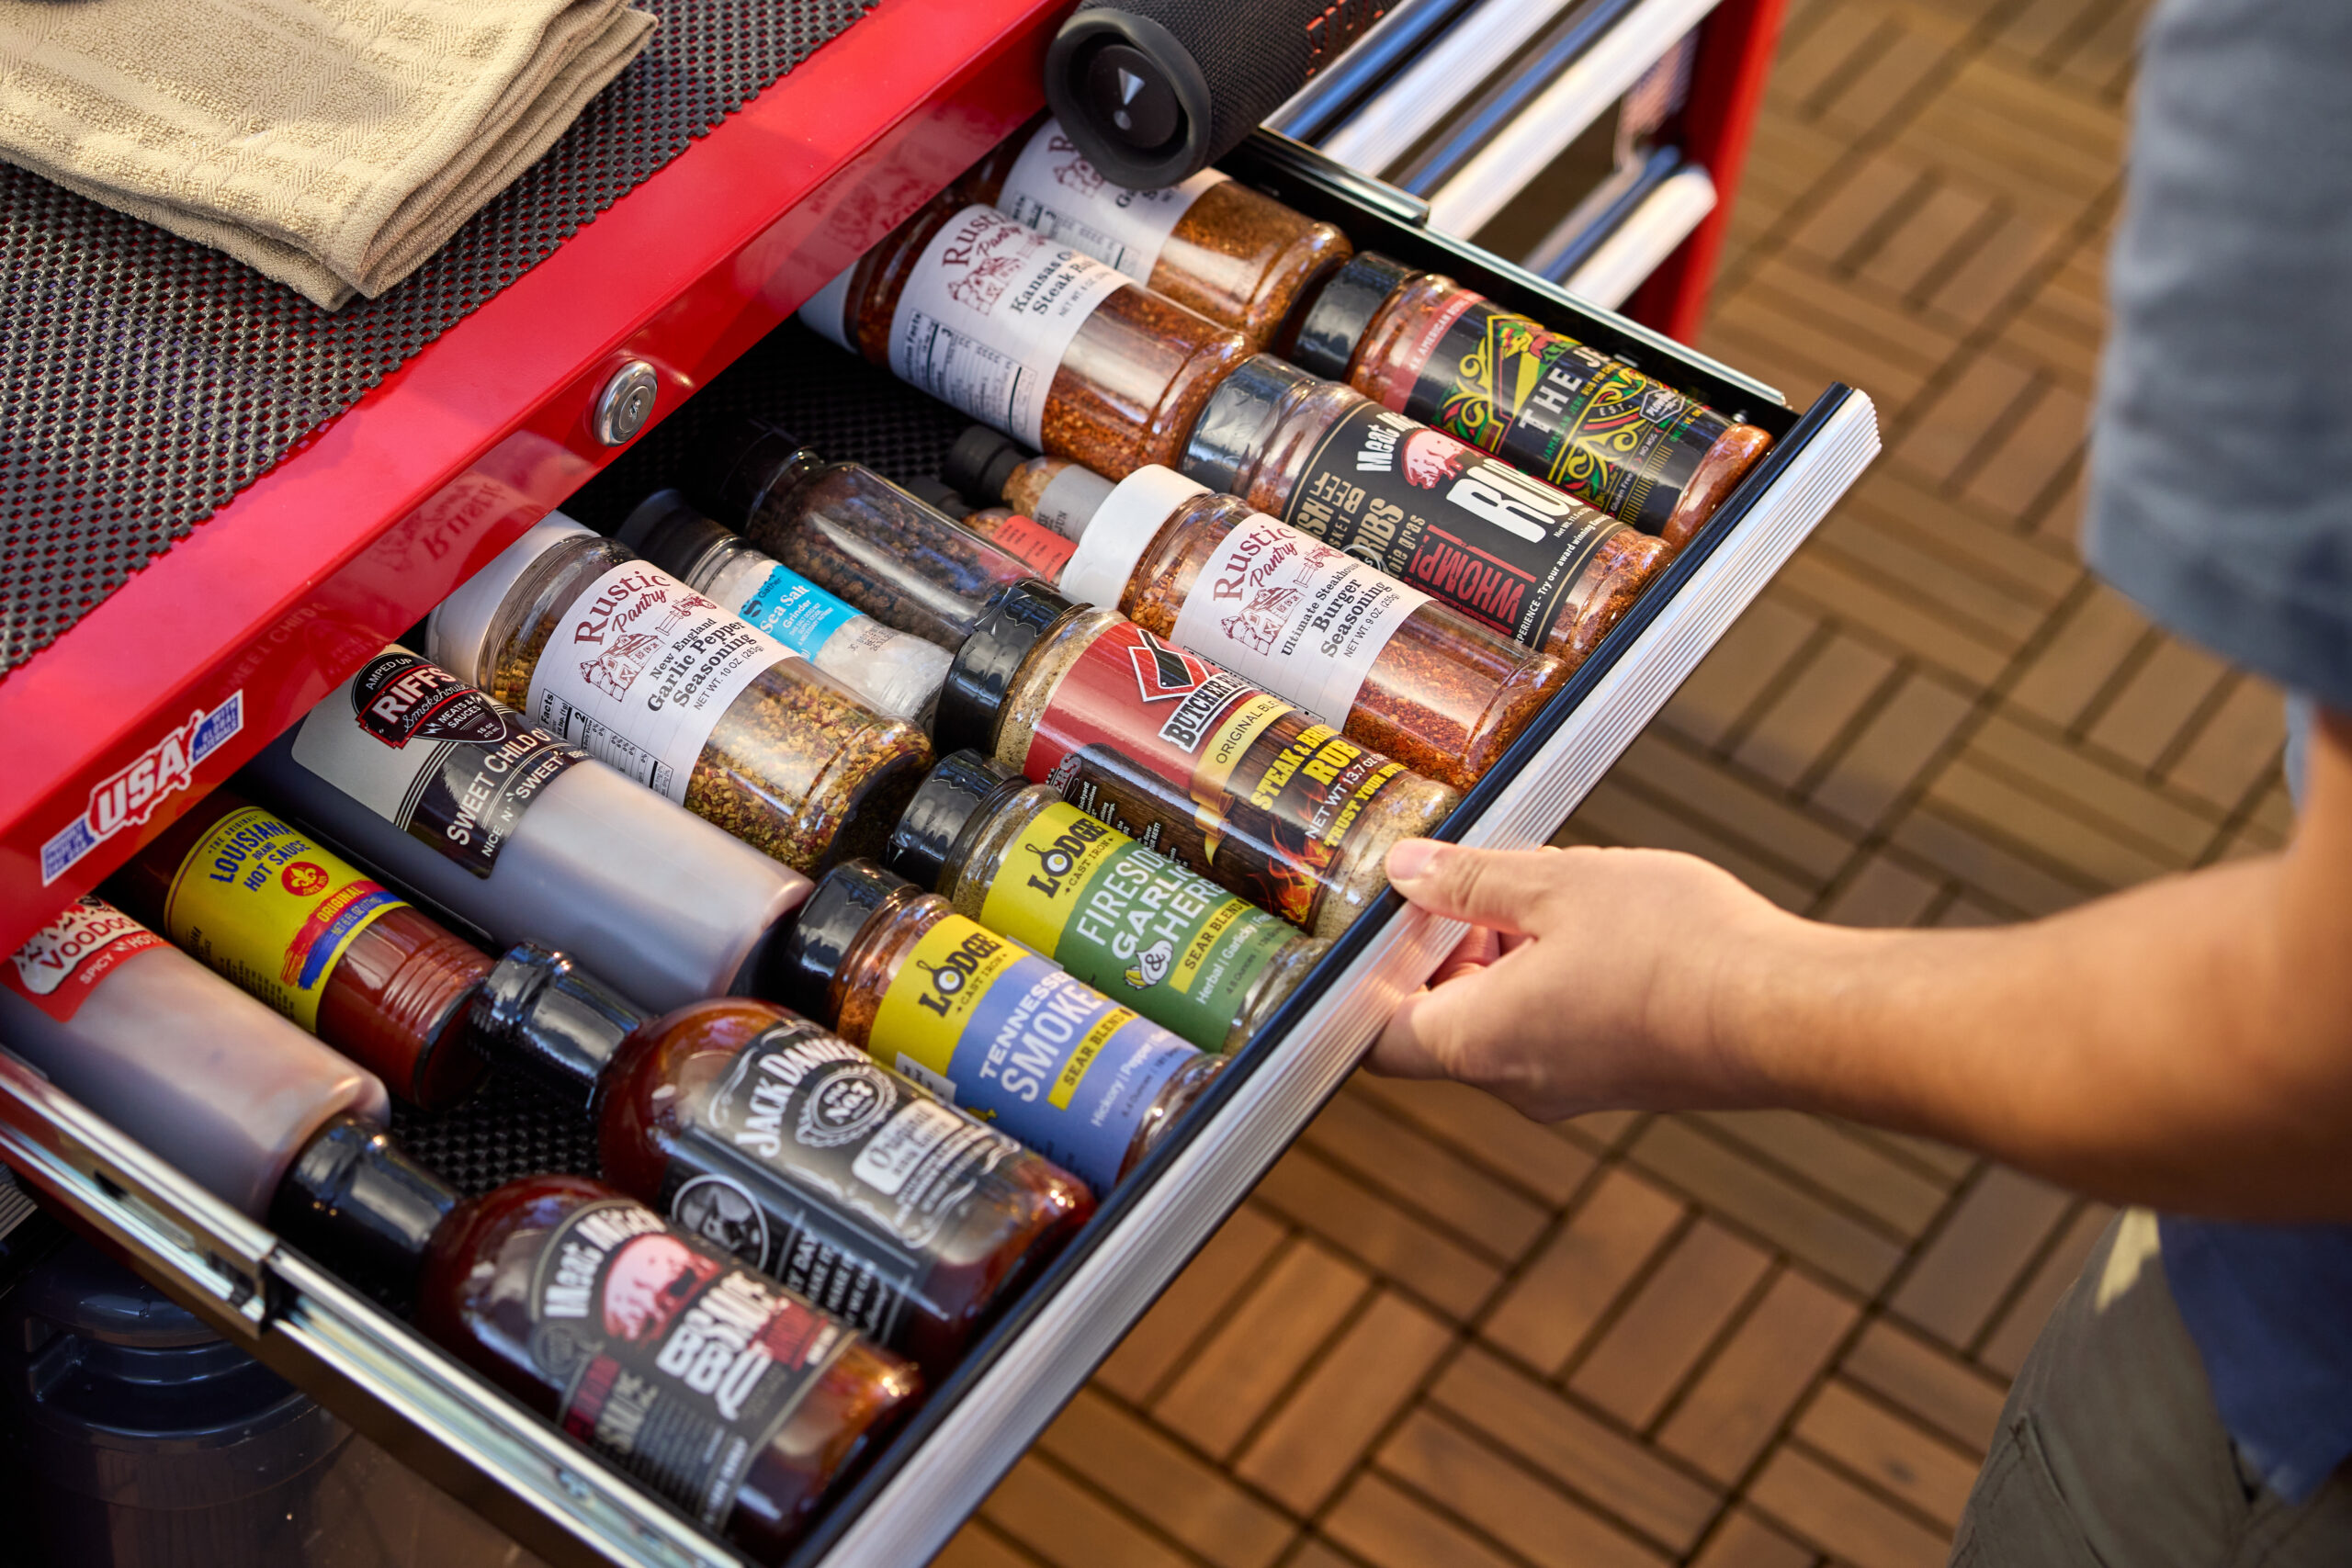
Step 3: Organize Seasonings and Sauces
The two remaining drawers above the cooler are a great spot for storing your favorite grill seasonings and sauces. To keep things neat, consider using small organizers or drawer dividers. We recommend grouping them by type (marinades, rubs, BBQ sauces, etc.) to make them easy to grab when you need them. Consider adding drawer liners to prevent bottles from sliding around when you move the chest.
Step 4: Organize Grill Tools
Use the five remaining drawers on the other side of the chest to store all your grill tools and accessories. We recommend organizing them by type:
Drawer 1 (Top): Thermometers, timers, grill gloves, and smaller gadgets
Drawer 4 (Middle): Skewers, grill baskets, and cooking grates
Drawer 5 (Bottom): Charcoal, lighter fluid, or wood chips
Consider lining the drawers to prevent grease or sauce spills from dirtying the chest.
Step 5: Add Finishing Touches
To make your DIY grill cart even more functional, consider adding these extra enhancements:
Label Drawers: Use labels to clearly indicate what’s inside each drawer.
Add Hooks: Install hooks on the chest’s sides for holding trash bags, aprons, or towels.
Add Magnetic Strips: Mount a magnetic strip to the sides for quick access to metal tools like spatulas and tongs.
Add Wheels: If you’re using a tool chest without wheels, consider adding them for easy transport.
Add Grill Caddies: If you need additional storage space, add some small grill caddies or tool holders on the top or sides of the chest for BBQ tools, paper towels, silverware, and more.
Customize the Top: The flat top surface of the chest can double as a prep station or even a serving counter space for your outdoor kitchen. Add a heat-resistant mat or a cutting board to create a usable workspace.
This tool chest hack is a game-changer for grilling enthusiasts. Whether you’re hosting a backyard barbecue or enjoying a quiet grilling evening with family, this setup ensures all your essentials are organized and within reach.