Learn how to maintain your rotary tiller with these tips.
A rotary tiller is an essential tool for both farmers and gardeners. It breaks up soil, prepares fields, and ensures gardens or farmlands are ready for planting. But like all equipment, a rotary tiller requires consistent care and upkeep to perform at its best. Without it, you could experience frequent breakdowns, costly repairs, and even a shortened lifespan.
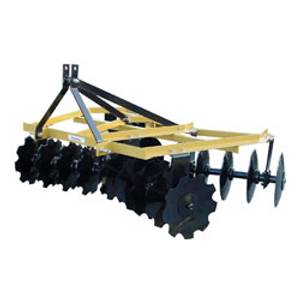
By following this maintenance checklist from Blain’s Farm & Fleet, you can ensure that your rotary tiller will be well-maintained for many farming seasons to come.
Keeping your rotary tiller in good condition has several benefits:
Boosts Performance: Consistent maintenance ensures that your tiller operates efficiently, delivering optimal performance and results.
Prevents Costly Repairs: Identifying and addressing minor issues early will help save you from expensive repairs down the road.
Extends Equipment Lifespan: A well-maintained tiller can last for years, meaning you won’t need to replace it as often.
Ensures Safety: Regular checks help mitigate risks, so your rotary tiller will remain safe to use.
Rotary Tiller Maintenance Checklist
Follow this maintenance routine to keep your rotary tiller in excellent working condition:
1. Check and Replenish Gear Oil Levels
Gear oil lubricates the internal mechanisms of your rotary tiller, which minimizes wear and tear caused by friction. To keep these parts running smoothly, periodically check and maintain proper gear oil levels. Make sure there is enough lubrication, and top it up as needed. Use the recommended gear oil specified in your user manual.
During these checks, we also recommend looking for any oil leaks around the seals or gearbox. Address them promptly to avoid any further tiller problems.
2. Grease Key Components
Proper lubrication ensures the moving parts of your rotary tiller work together smoothly and prevents rust and other wear and tear. Every eight hours of operation, grease the following areas:
Outboard hub
PTO shaft
Universal joints
PTO shaft safety shield
Telescoping surface
Use a high-quality Type II tube grease for all parts listed. Make sure you avoid greasing the slip clutch assembly, as this can cause it to seize up and malfunction. We suggest storing a grease gun in your toolbox and doing a quick lubrication check before and after each operation.
3. Inspect Safety Shields
Your safety and the safety of those around you should always come first when operating heavy equipment. Before each use, check to make sure all safety shields are securely attached and functioning properly. Replace any damaged or missing shields immediately. Operating with faulty or missing shields increases the risk of accidents.
4. Check and Replace Tines
The tines are the backbone of your rotary tiller, and damaged tines can severely impact soil tilling quality. Over time, they experience significant wear from contact with soil, rocks, and roots, so following a regular maintenance schedule is important.
Inspect tiller tines for any cracks, breaks, bent edges, or excessive wear before every use. If you need to replace any tines, torque the bolts to 100 ft/lbs for proper attachment. We suggest keeping an extra set of tines on hand in case you need replacements mid-season.
5. Tighten Nuts and Bolts
Loose bolts can cause parts to detach or malfunction during operation, leading to equipment damage or accidents. A quick inspection to make sure all nuts and bolts are tight, secure, and torqued to the proper level can help avoid these issues.
Start by checking the bolts holding the top gearbox to the base plate and the “L” bracket. Torque these to 75ft/lbs. Then, check the bolts securing the crossover shaft from the top gearbox to the side gearbox. Torque these to 45ft/lbs. Investing in a torque wrench can make this process easier and more accurate.
6. Adjust the Slip Clutch
The slip clutch is a critical component of the PTO mechanism. It prevents damage by allowing slight slippage instead of forcing the tiller under excessive strain.
Periodically loosen the torque spring bolts, and allow the slip clutch to rotate for approximately two revolutions. Loosen the bolts until the springs stop touching the flange yoke. This ensure that the slip clutch is not stuck in a locked position.
After loosening, tighten the torque spring bolts until the nut makes contact with the flange yoke. Once this happens, tighten an additional one-and-a-half turns to secure the clutch. Check and adjust the slip clutch regularly, especially after long periods of not using it or if your tiller experiences irregular power transmission.
Troubleshooting Common Issues
Slip Clutch Not Engaging: Make sure the torque spring bolts are properly adjusted according to the instructions above. If this doesn’t resolve the issue, inspect for rust or dirt buildup on the clutch components.
Uneven Tilling: Check for damaged or improperly secured tines. Also, make sure that the tiller is level when attached to your tractor.
Strange Noises: Unusual sounds often indicate loose bolts, insufficient lubrication, or worn-out components. Determine the source of the noise promptly to avoid further damage.
Additional Maintenance Tips
Clean After Using: After each use, clean your rotary tiller to remove dirt, mud, and other debris. Pay special attention to the tines and gearbox area.
Store Properly: When not in use, store your tiller in a dry, sheltered area to protect it from the elements. Use a protective cover for extra security.
Inspect Belts and Chains: If your rotary tiller has belts or chains, inspect them regularly for signs of wear or looseness, and replace as needed.
Follow the Operator’s Manual: While this checklist applies to most rotary tillers, your specific machine might have unique requirements. Always refer to the operator’s manual for guidance on approved tools for maintenance, frequency of specific tasks, and warnings or safety guidelines.
Maintaining your rotary tiller doesn’t have to be complicated. By following these steps, you can ensure your tiller remains a reliable farming partner for years to come. If there’s anything you’re unsure about, consult with a professional or refer to your owner’s manual.
Spend less time laboring in the fields with the right ag sprayer from Blain's Farm & Fleet. Use our buying guide to pick the perfect ag sprayer for you.
To make sure you do the best job possible and prevent back pain, you need a good quality tractor seat. Money spent on tractor seats is money well-spent.