If you’re short on space but still want to grow your own fresh, juicy tomatoes, an upside-down garden (or hanging garden) could be the perfect solution. This DIY project is a great way to maximize small spaces while adding a touch of greenery to your balcony or backyard. Plus, it’s fun to make! Follow this guide, which was inspired by Blain’s Farm & Fleet’s recent TV commercial, to create your own hanging tomato garden and enjoy a bountiful harvest, no matter how limited your space may be!
Before you start assembling your garden, gather the following materials:
Wood: You’ll use this to construct the frame. Choose sturdy wood like cedar or treated lumber to withstand outdoor elements.
Wire: Use wire mesh or garden trellis netting for the tomatoes to climb.
Hanging planters: Look for pots specifically designed for hanging plants, or use regular pots or 5-gallon buckets and drill drainage holes as needed.
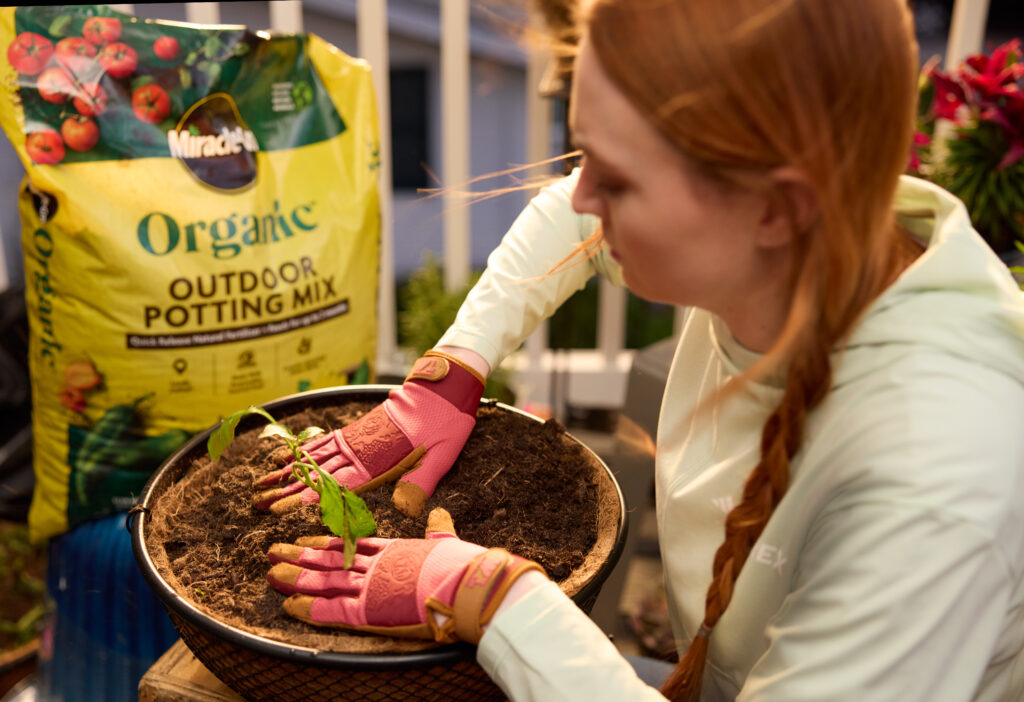
Tomato plants: Seedlings work best, but you can start from seeds if you prefer. We recommend smaller varieties such as cherry tomatoes or Roma tomatoes.
Potting soil: Use a high-quality potting mix rich in nutrients for vegetable plants.
The first step is to construct a sturdy frame that will support the hanging tomato plants. This will be the backbone of your garden.
Start by designing your frame. A simple rectangle shape works best for stability. Measure and cut your wooden beams to your desired lengths. We recommend measuring the space on your balcony ceiling where you’ll attach the frame. It should fit comfortably and leave enough room for planters.
Assemble the beams into your frame shape using screws, nails, or corner brackets. Make sure the frame is sturdy enough to handle the weight of the planters. For added stability, you can put a beam in the middle or reinforce the corners with extra wood.
Stretch the wire or trellis netting across the top of the frame. Secure the edges with screws or staples, ensuring it’s pulled tight to hold the weight of climbing tomato vines. This structure will give the vines something to cling to and grow across as the plants develop.
Drill holes or attach brackets to the top corners of the frame for mounting it to your balcony roof.
Step 2: Install the Frame on Your Balcony
Make sure your balcony structure can support the weight of the frame and planters before proceeding. Then, use a drill to create holes in the balcony roof, or install heavy-duty hooks. Lift the wooden frame, and attach it securely to the balcony roof using screws, hooks, or brackets. Double-check that it’s secure before adding any weight to it.
Step 3: Plant Your Tomatoes
Now it’s time to get your tomatoes growing!
If you’re using buckets or pots that aren’t designed for hanging, drill small holes on each side to attach hooks or chains. Then, add a few small drainage holes to the bottom of the buckets to prevent water from pooling.
Fill the buckets with your potting soil, stopping about 2-3 inches from the top.
If you’re using tomato seedlings, carefully remove them from their containers, and transfer them to the planters. Plant them deep enough to cover part of the stem, which encourages a stronger root system. If you’re starting from seeds, plant them directly into the soil, and follow the instructions on the seed packet for depth and spacing.
Step 4: Hang the Planters
With your planters prepared and your frame ready to go, you can hang your tomato garden! Use S-hooks or sturdy hanging chains to attach the planters to the wire frame. Space the planters evenly to prevent crowding, and ensure each plant has enough room to grow. Make sure each one is securely fastened to avoid accidents caused by wind or weight.
Step 5: Water and Maintain
Water regularly: Hanging tomato planters tend to dry out faster, so check moisture levels frequently and water as needed. Avoid overwatering.
Support the vines: As the tomato plants grow, gently guide the vines to the wire or trellis netting. Use twine or soft plant ties as needed to provide additional support and keep the vines from sagging.
Fertilize monthly: Apply a fertilizer every few weeks to encourage healthy growth and fruit production.
Prune and maintain: Remove yellowing leaves and suckers (small shoots that grow between the main stem and branches) to keep the plants thriving.
Keep pests at bay: Hanging baskets are naturally more resistant to ground pests, but keep an eye out for aphids or other flying insects. Use non-toxic sprays or neem oil, if needed.
Rotate the planters: If one side of the garden gets more sun, rotate the planters weekly to ensure they receive even light distribution.
An upside-down tomato garden is a great way to make the most of your space and grow fresh produce at home. By following these steps, you’ll have your own thriving tomato garden in no time. Happy gardening!
For more how-to guides like this one, check out our other Gardening articles.