


How ToArticle
Painting an Outdoor Bench
Transform your old wooden outdoor bench into a bold, beautiful statement piece with the help of Rust - Oleum and Blain's Farm & Fleet.
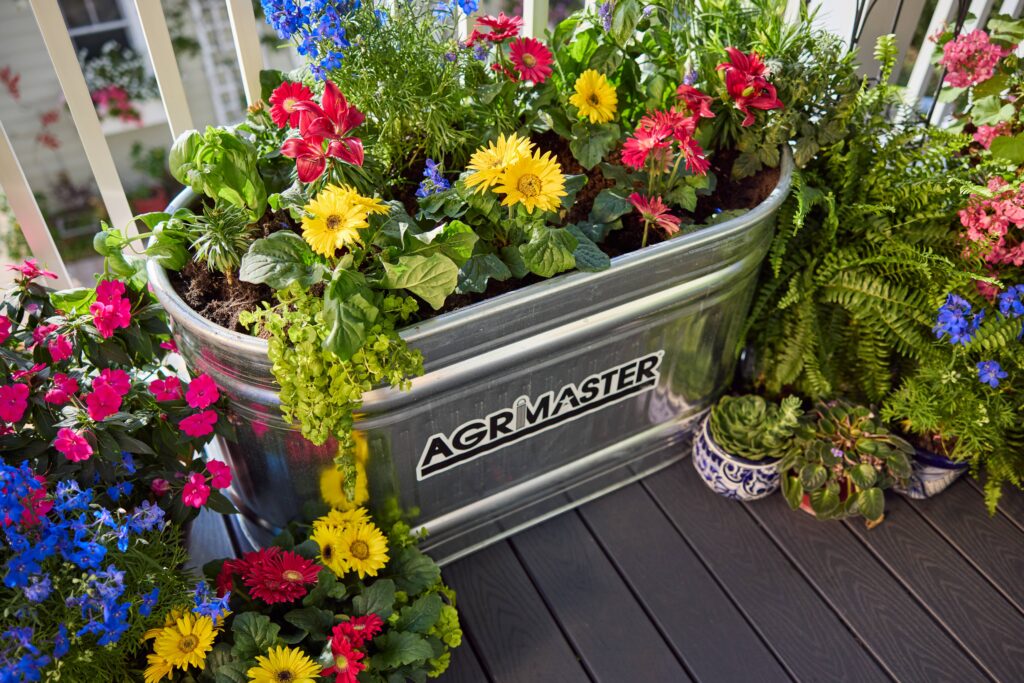
Read More May 25, 2016 | Blain's Farm & FleetLooking to grow your own vegetables, herbs, or flowers but short on time or space? A stock tank garden bed is just what you need! These galvanized metal tanks, originally designed as watering troughs for livestock, make excellent garden beds because they’re sturdy, weather-resistant, and add a nice rustic element to your backyard or patio.
Follow this step-by-step guide from Blain’s Farm & Fleet to create a stock tank planter of your own.
Before you get started, gather the following materials and tools:
Stock tanks come in many sizes and depths, so choose one that caters to the type of plants you want to grow. For fruits or vegetables like tomatoes, artichokes, or rhubarb, pick a tank with a depth of two to three feet. For herbs, flowers, and other greenery, you’ll only need a soil depth of around one foot.
Next, find a place in your yard where you want to keep the planter. Look for a spot that receives at least six to eight hours of sunlight each day, depending on your specific plants’ requirements. Also ensure it has a flat surface to keep the tank stable.
For good drainage, lay gravel or sand at the base of the area to prevent water from pooling underneath. If needed, you can elevate the tank slightly using cinder blocks or wooden planks.
Proper drainage is key to avoid waterlogging your plants. Stock tanks don’t come with built-in drainage, so you’ll need to create your own. Turn the stock tank upside down, and drill several holes in the bottom of the tank, spaced about 8-10 inches apart. Be sure to wear safety glasses while drilling to protect your eyes from metal debris.
Once you’re done, spray the edges of the holes with galvanized compound to keep them from rusting over time.
Place your stock tank where you want it before adding any materials, as it can be quite heavy once filled. To reduce soil usage and promote drainage, you can add filler materials like gravel or coarse stones at the bottom of the tank, about 2-3 inches deep. Make sure you leave enough space for the soil depth your plants require.
To keep soil from clogging the drainage holes you drilled, install a layer of landscape fabric or wire mesh on top of the gravel. Cut the fabric to fill the bottom using scissors or a utility knife.
Now it’s time to fill your stock tank with garden soil. Use a high-quality, well-draining soil mixture suitable for the plants you’ve chosen. Pour your soil into the stock tank, leaving about 2-3 inches of space from the top.
Now comes the fun part! Arrange your plants or seeds in the soil according to the spacing and sunlight requirements shown on their labels. We recommend arranging taller plants near the back and smaller ones in the front so none of them get too shaded.
Give your new garden bed a good watering. You’ll want to make sure you keep the soil consistently watered. Like raised beds, stock tank planters can dry out much quicker than gardens that are in the ground. You can use a drip irrigation system, but hand watering also works.
Once your stock tank garden bed is set up, consistent care will keep it thriving. Here’s how to maintain it:
Creating a DIY stock tank garden bed is a simple way to start a garden while adding charm to your outdoor space. It’s a project that’s easy to assemble, maintain, and enjoy all year round. Whether you’re growing vegetables, flowers, or herbs, your new stock tank raised garden bed is sure to become a favorite feature in your yard.
For more how-to guides like this one, check out our other Gardening articles.
