Storing a camper or RV for winter without proper preparation can lead to burst pipes, mold growth, damaged seals, and costly repairs come spring. Winterizing protects your investment and ensures your rig is ready to roll when the weather turns warm again. This guide covers everything you need to know, from draining your water system to protecting your tires, with practical advice for Midwest campers who deal with hard freezes, road salt, and long storage seasons.
Key Takeaways
Winterizing a camper or RV means draining all water systems and adding antifreeze to prevent freeze damage
Most RV owners winterize before nighttime temperatures drop consistently below 32°F (0°C)
The process typically involves blowing out water lines, adding RV-safe antifreeze, and protecting the exterior, tires, and battery
Proper winterization can prevent hundreds or even thousands of dollars in spring repair costs
Blain’s Farm & Fleet carries the supplies, tools, and expertise to help campers winterize correctly
What Does It Mean to Winterize a Camper or RV?
Winterizing a camper or RV is the process of preparing the vehicle for cold-weather storage by protecting its water system, mechanical components, and exterior from freeze damage, moisture, and long-term wear. Water left in pipes, tanks, or water heaters will expand when it freezes, cracking lines and fittings. Seals and tires degrade when exposed to prolonged cold without protection. Batteries drain when left unmanaged. Winterizing addresses all of these risks before they become problems.
For Midwest campers in states like Wisconsin, Illinois, Iowa, and Minnesota, this process is especially important. Hard freezes arrive early, temperatures swing dramatically in fall, and a camper left unprepared in November can sustain serious damage by March.
Fast Answer: How Do You Winterize an RV or Camper?
To winterize an RV or camper, drain and bypass the water heater, blow out all water lines with compressed air, add RV-specific antifreeze to the plumbing system, and close all drain valves. Beyond the water system, you should also disconnect or maintain the battery, cover the exterior, protect the tires from UV and cold, and seal any openings where pests might enter. The full process takes most campers two to four hours and requires basic tools, compressed air, and RV-safe antifreeze.
Understanding the Winterization Process: Step by Step
How Does RV Winterization Work?
The core goal of winterization is to remove water from every part of the plumbing system where it could freeze and expand. Water expands roughly 9% when it freezes, and that pressure is enough to crack PVC pipes, copper fittings, and plastic connectors.
There are two primary methods:
The Compressed Air Method: A compressor blows pressurized air through each water line, forcing water out of the pipes, faucets, and fixtures. This method works well but may not remove every drop from low-lying sections of pipe.
The Antifreeze Method: RV-safe, non-toxic antifreeze (typically propylene glycol-based) is pumped through the water lines to displace remaining water. This is the most reliable method and is especially recommended for complex plumbing systems or cold climates where temperatures drop well below freezing.
The Combined Method: Many experienced RV owners blow out the lines first, then add antifreeze as a secondary measure. This is the most thorough approach for Midwest winters.
Water heater (must be bypassed before adding antifreeze)
Hot and cold water lines throughout the RV
All faucets, including kitchen and bathroom
Toilet and toilet valve
Shower and bathtub drains
Exterior shower, if equipped
Ice maker and washing machine connections, if present
Gray and black holding tanks
Skipping even one component, particularly the water heater or a low-point drain, can leave water sitting where it can freeze and cause damage.
What to Look for When Buying Winterization Supplies
What RV Antifreeze Should You Use?
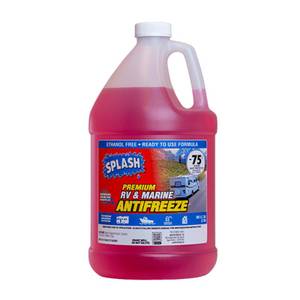
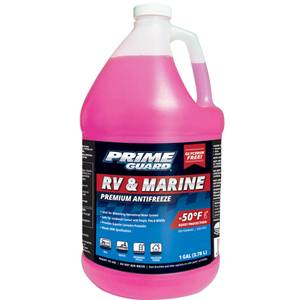
Use only antifreeze specifically labeled for RV or marine use. RV antifreeze is typically propylene glycol-based and non-toxic, safe for use in potable water systems. Never use automotive antifreeze, which is ethylene glycol-based and poisonous if ingested from residual contact with your water system.
Key things to check on the label:
“RV and Marine” designation
Non-toxic and biodegradable rating
Burst protection rating (look for protection to at least -50°F for Midwest winters)
Pink or blue coloring (both are commonly available; pink is most common for RV use)
Most campers need two to three gallons for a standard trailer, though larger Class A motorhomes may require more.
For the blow-out method, you need an air compressor and an RV blow-out plug, which is an inexpensive adapter that connects your compressor to the city water inlet. Set your compressor to no more than 50 PSI for most RV plumbing systems. Exceeding this can damage fittings and fixtures.
Other Supplies Worth Having
Water heater bypass kit (if not already installed)
RV water pump converter kit (to pull antifreeze through the pump)
Moisture absorbers or desiccant packs for the interior
Tire covers to block UV and cold
Battery maintainer or trickle charger
Roof sealant for checking and touching up any cracked seams
Rodent deterrents (dryer sheets, steel wool, or dedicated pest deterrent products)
Comparing Winterization Methods: Which Approach Is Right for Your Rig?
Method
Best For
Pros
Cons
Compressed air only
Mild climates, simple plumbing
Fast, no chemical residue
May miss low-lying water pockets
Antifreeze only
Complex systems, first-time winterizers
Thorough, reliable
Takes more time, requires flush-out in spring
Combined method
Midwest winters, long storage periods
Most complete protection
Slightly more time and materials
Professional service
Those who prefer hands-off approach
Convenient, guaranteed
Costs more than DIY
For most Midwest campers storing their RV from October through April, the combined method or antifreeze-only method offers the most reliable freeze protection.
Practical Winterization Tips for Midwest Campers
When Should You Winterize Your Camper in the Midwest?
Winterize before the first hard freeze in your area, which in much of the Midwest arrives between mid-October and mid-November. Do not wait for a freeze warning to act. Water sitting in pipes can freeze overnight during an early cold snap, even if the daytime temperature was mild. A good rule of thumb: if nighttime lows are regularly dipping below 40°F, it is time to begin the process.
How Do You Protect an RV Roof and Exterior for Winter?
Cold temperatures, UV exposure, and weight from snow accumulation can all damage an RV roof and exterior over winter. Before storage:
Inspect the roof for cracked or peeling sealant around vents, skylights, and seams
Apply a compatible RV roof sealant to any soft spots or cracks
Wash and wax the exterior to protect the finish
Install tire covers on all tires to prevent UV cracking and ozone degradation
Consider a breathable RV cover if storing outdoors, particularly in areas with heavy snowfall
A standard lead-acid battery will discharge and potentially freeze if left unattended in cold storage. There are two main approaches:
Remove and store indoors: Bring the battery into a garage or basement where temperatures stay above freezing. Check the charge monthly and top up as needed.
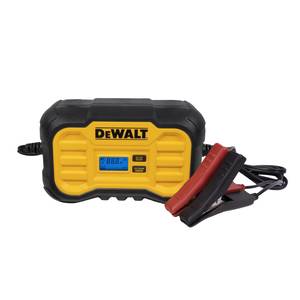
Connect a battery maintainer: A quality trickle charger or battery maintainer can keep the battery at an appropriate charge level through winter without overcharging it. This is the preferred option for motorhomes or rigs where removing the battery is complicated.
Lithium batteries handle cold better than lead-acid but still benefit from being stored at a partial charge in mild temperatures when possible.
What About Rodent and Pest Prevention?
An RV sitting still for months is an attractive shelter for mice, squirrels, and insects. Gaps around plumbing, wiring, and vents are common entry points.
Practical deterrents include:
Stuffing steel wool into any gaps around pipes and openings (mice cannot chew through it)
Placing moisture-absorbing products and scent-based deterrents like peppermint oil or cedar inside the RV
Checking and replacing vent covers and roof vent screens
Setting traps around the exterior as a secondary measure
Inspect your rig thoroughly in early spring before your first trip. Mouse damage to wiring and insulation is one of the most common and frustrating spring discoveries for Midwest campers.
Common Winterization Mistakes to Avoid
What Happens If You Skip the Water Heater Bypass?
If you add antifreeze without bypassing the water heater first, antifreeze will flow into the water heater tank, which typically holds six to ten gallons. This wastes a significant amount of antifreeze and does not protect the water heater any better than simply draining it. Install a bypass kit to isolate the water heater from the antifreeze circuit.
Can You Winterize an RV Without a Compressor?
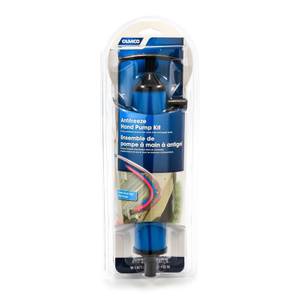
Yes. The antifreeze-only method does not require compressed air. Use a hand pump or a water pump converter kit to draw antifreeze from a container directly through your RV’s water pump and into the lines. Open each faucet one at a time until pink antifreeze appears, then close it and move to the next.
What If You Miss a Low-Point Drain?
Most RVs have low-point drains on both the hot and cold water lines, typically located underneath the coach. These are the lowest points in the plumbing system where water naturally collects. Leaving them closed traps water that compressed air may not fully evacuate. Open and drain both low-point drains before blowing out the lines or adding antifreeze.
How Blain’s Farm & Fleet Supports Campers Through Winterization
Blain’s Farm & Fleet stocks a broad selection of RV winterization supplies, including RV-safe antifreeze, blow-out plugs, battery maintainers, tire covers, sealants, and moisture control products. Store staff are familiar with the practical needs of Midwest campers and can help customers identify the right antifreeze for their system, choose the correct compressor fittings, or find pest deterrents that hold up through a long storage season.
Beyond supplies, Blain’s carries the tools and accessories that make the overall process easier, from portable air compressors suitable for the blow-out method to storage covers sized for everything from pop-up campers to full-size fifth wheels. For customers who also maintain hobby farm equipment or vehicles over winter, the store offers a practical one-stop option for seasonal storage needs across categories.
Frequently Asked Questions About Winterizing a Camper or RV
How much RV antifreeze do I need to winterize my camper?
Most travel trailers and small motorhomes require two to three gallons of RV antifreeze. Larger Class A or Class C motorhomes with more complex plumbing may need four gallons or more. It is better to have an extra gallon on hand than to run short mid-process.
Can I use regular antifreeze in my RV?
No. Automotive antifreeze contains ethylene glycol, which is toxic and not safe for use in RV water systems. Always use propylene glycol-based antifreeze labeled specifically for RV or marine use.
Do I need to winterize a camper if it’s kept in a heated storage unit?
If the storage unit maintains temperatures consistently above 32°F throughout winter, freeze damage is unlikely. However, draining and bypassing the water system is still a good practice, as storage unit temperatures can fluctuate. Winterizing takes a small amount of time and provides peace of mind regardless of where the RV is stored.
How do I de-winterize my RV in the spring?
Flush all water lines thoroughly with fresh water to remove any remaining antifreeze. Reconnect the water heater, check all connections for leaks, sanitize the fresh water tank with a diluted bleach solution, and run water through each faucet until it runs clear. Replace any filters that were removed for winter.
Is it safe to stay in an RV that has been winterized?
No. Once RV antifreeze has been added to the plumbing system, the RV should not be used for camping or water use until it has been fully de-winterized and flushed. Antifreeze in the lines means no running water for cooking, drinking, or sanitation.
What temperature is too cold for an RV?
Water in RV plumbing begins to freeze at 32°F. However, the real risk comes when temperatures stay below freezing for an extended period, as insulation in most RVs is not sufficient to protect pipes during prolonged cold snaps. Winterize before consistent nighttime lows reach the mid-30s.
How long does it take to winterize an RV?
Most campers can complete a thorough winterization in two to four hours. Those doing it for the first time may take longer. Having all supplies gathered ahead of time, including antifreeze, compressed air equipment, and bypass fittings, makes the process more efficient.
Face Spring with Confidence
Winterizing a camper or RV is one of the highest-value maintenance tasks a camper owner can do. A few hours of preparation in fall prevents weeks of repair work in spring and protects an investment that many families rely on for years of use. The process is straightforward, the materials are affordable, and the benefits are clear. Start before the first freeze, work through each system methodically, and store the rig with the same care you would give any piece of equipment that needs to perform reliably season after season. When you are ready to stock up on supplies or have questions about your specific setup, Blain’s Farm & Fleet is a practical place to start.